Legal notice:
The Emperor Ming's attorneys are trying to reach an agreement with Mr. Crockford, copyright holder for the JSON data interchange format, so this recipe can be used to teach how to produce high quality extraterrestrial villain software. Until then we are forced to add the following statement to our slice:
The Software shall be used for Good, not Evil

We are in a mission to provide Ming, Emperor of Mongo, with an Imperial Todo List. But, don't despair. With web2py it's quite a simple task.
web2py supports mongodb connections with the MongoDBAdapter. This adapter is still experimental, but it's almost fully functional (almost because there are still a few operators not implemented). In fact, the most common crud db transactions and search commands are already available. And don't worry it's simpler that Dr. Zarkov's spaceship

Here's what we have to do
First, let's open a MongoDB cloud account for storing data remotely. I used MongoHQ for this recipe because the user interface is very nice, dbs are easy to deploy, and had no significant issues using it so far. This way, we don't need to install and maintain a local MongoDB server in our system (but note that using a local db, data transactions will be a lot faster). MongoHQ (as the time of writing) gives free accounts for low traffic/development databases that can scale in production.
To open a MongoHQ account, visit the MongoHQ signup page
Once you're logged in, create a database from the options provided by the user interface at https://new.mongohq.com/<your account's name>/mongo/new
Now you'll be asked for a db name, use something evil but cool, like ming (remember your mission!). Once you have created your mongo db, look for the connection URI provided by the remote service in https://new.mongohq.com/<your account's name>/mongo/ming/admin
You'll need that URI to start the app's db connection
You also need to create a user to connect to the service in https://new.mongohq.com/<your account's name>/mongo/ming/users
To connect to a mongodb server with web2py you will need this Python package installed in your system:
http://pypi.python.org/pypi/pymongo
Now for the app code
We must create a ming app in web2py's admin interface, you know what I'm talking about, but if you don't, look at the official docs in web2py.com/book on how to create apps (it's very simple)
In ming/models/db.py (or any custom model archive you are using) modify the connection string using the new URI so it looks like:
db = DAL("mongodb://<user>:<password>@<host>.mongohq.com:<port>/ming",
         check_reserved=["mongodb_nonreserved",],  adapter_args={"safe":False})
Note the safe:False thing, this is needed because an odd error between some adapter versions and mongodb databases when saving changes synchronously.
And this is our Imperial Table Definition at the end of the model file:
db.define_table("todo",
                Field("task"),
                Field("description", "text"),
                Field("scheduled", "date"),
                Field("doc", "json"))
His Malignity needs a table where to register his evil wills.
Notice the "json" field type declared for the "doc" field. Starting from version 2.4.1-alpha, web2py supports the JSON notation for storing mongodb documents or any json compatible data objects (including Python objects serializable as json). With this feature, you don't need to store json data as plain text, preserving numeric or string types (or any other object defined by JSON) and document structure. The json field type can be used with any of the web2py builtin adapters (i.e. SQLite).
The json field type also provides a default json widget with a IS_JSON validator, that will return an error message in case you tried to send invalid json values (you should be very careful not to do things like that in a planet like Mongo, it's strongly discouraged).
In ming/controllers/default.py we add:
def index():
    todos = SQLTABLE(db(db.todo).select(),
                     columns=["todo.task",
                              "todo.description",
                              "todo.scheduled", "todo.doc"],
                     headers={"todo.task": "Task",
                              "todo.description": "Description",
                              "todo.scheduled": "Scheduled",
                              "todo.doc": "Json"})
    form = crud.create(db.todo)
    return dict(form=form, todos=todos)
And our final move is to create a view for this galactic villain interface (ming/views/default/index.html):
{{ left_sidebar_enabled, right_sidebar_enabled = False, ('message' in globals()) }}
{{extend 'layout.html'}}
{{img=IMG(_src=URL(c="static", f="images/ming-640.png"), _width="300px")}}
{{header=H3(T("His Majesty's Todo List"))}}
{{=TABLE(TR(TD(CENTER(img),BR(), todos), TD(header, form)))}}
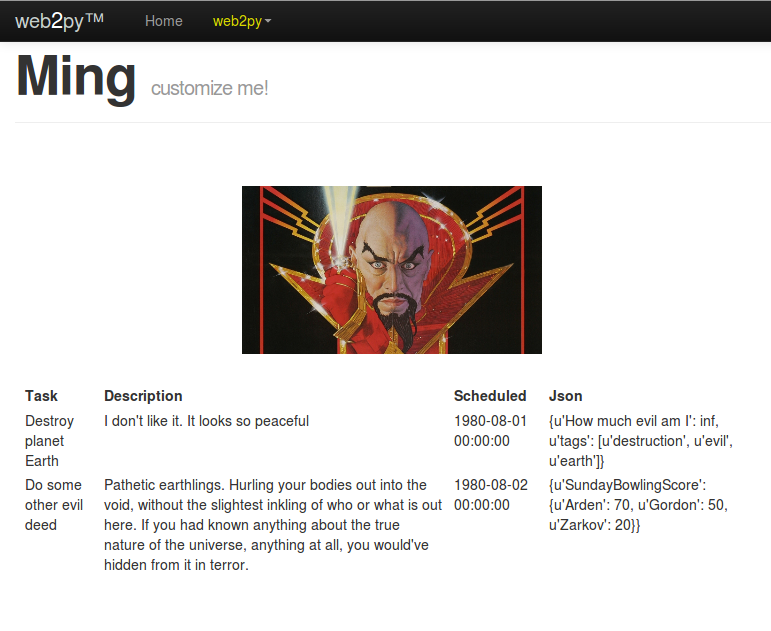
I used one of His Majesty's bitmaps posted in the web, but you may use the picture of your boss if you prefer.
If you make a space trip to http://localhost:8000/ming (In development), you should see the Emperor Todo web interface:

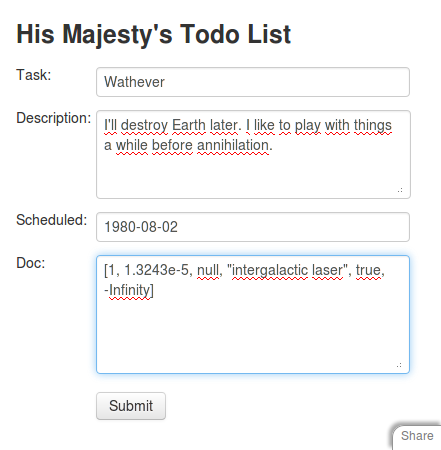
In the right part of the Imperial Web Interface, you'll see a Create Todo form:

With this few lines of code, we built a complete todo app connected to a MongoDB database and full support for JSON notation storage and input validation, thanks to the powerful tools that web2py provides, and satisfied the will of Ming, the enemy of every creature on Mongo.


Comments (2)
0
marcel-maré-11434 11 years ago
Thanks for this slice!
One of the reasons of using MongoDB would be to make use of its (non-SQL) query facilities. Using DAL puts a SQL-esque layer on top of MongoDB, which is useful for auth or forms. But if I additionally want to use MongoDB specific functionality (to obtain total world domination of course, what else?), how would one use the DAL connection to do this? How can one get a connection to the Mongo database from the DAL connection pool?
replies (1)
0
rochacbruno 12 years ago
For sure this is the best well writen Slice here!
In the next version of the site I will include a place for "Featured Slices" and this one should be there!
replies (1)